

Applying Effects
 |
Effects Menu |
Scenes and objects created in Corel Draw could sometimes be improved by the addition of effects. Effects are things applied to an object to change the way they look or the shape of the object.
As you can see there are a few effects you can use. below I will take you through three of the different effects and leave the rest for you to investigate yourself.
Hopefully it will be enough to get you started.
Lens Example
In the example below I have applied a lens transparency effect to the text inside the square and faded it out a little.
 |
 |
object before lens transparency effect |
Object after lens transparency effect |
This was done as follows:
Lens transparency effect controls |
1. Select the object you wish the effect to act on, (in the example on the right it was the text object)
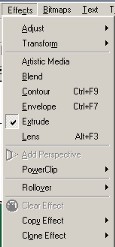
2. Select the lens Transparency effect, click on Effect > Lens > then select transparency from the drop down list of effects, (shown on the right)
3. change the amount of transparency by clicking on the small upward and downward pointing arrows on the rate box, (shown on the right) You can also change it's colour by clicking on the small downward pointing arrow on the right-hand sid eof the box labelled Color
Artistic Media Example
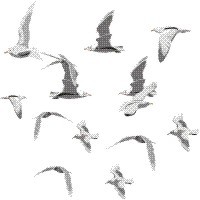
In the example below I have changed a plain green rectangle (square) into a flock of birds.
 |
 |
A plain green square |
A plain green square converted into
a flock of birds |
This was in the following way:
1. Select the Rectangle tool, (it is the 5th one down in the tool box down the right-hand side of your screen)
2. Click on the Effects menu
3. Click on the Artistic Media option, (a panel will open up on the right-hand side containing all the media available to you)
4. Draw a rectangle (square) on the paper, (or a star or pentagon, or any shape you wish)
5. Click on the birds panel, (or any other panel and see how the shape changes into the type of object you have clicked on)
Extrude Effect
In the example below, I drew a rectangle and converted it into a square rectangular block
|
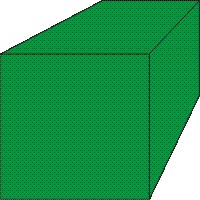 |
Plain green rectangle |
Rectangle converted into a rectangular
block |
This was done in the following way
 |
| Extrude panel from the effects menu |
1. Draw a rectangle, (it need not be square)
2. Click on the Effects menu
3. Select the Extrude option, (the panel shown on the right will be displayed)
4. Ensure that the extrude tab is selected, (it should be selected by default)
5. If you wish you can alter the depth setting, (this will make your block deeper or narrower)
6. The H setting moves the back face (back panel) left or right horizontally
7. The V setting moves the back face (panel) up and down vertically
8. When you are happy with the settings click on the Apply button
If you wish to change any of the setting with the existing object, then click on the Edit button
![]()